Tip : Updating Data - If there are updates available for the app the two arrows in the upper right corner of the dashboard will turn red. In order to download updates you will need either wifi or a network connection. You can still continue to use the app if you do not have wifi or a network connection to allow the updates to come through.
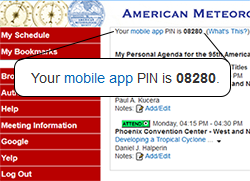 Tip: Setup – The setup for the app is located at the top of the dashboard by tapping the gear symbol. Setup allows you to pre-enter information so that you will not have to repeatedly provide passwords, answer questions, and set communication from the show staff on important messages. Some setup features include importing your schedule from Personal Scheduler. This will require a PIN.
Tip: Dashboard Schedule – Initially this does not show until you create your schedule or enter your Personal Scheduler Mobile App PIN. Once you have created your schedule, the next item on your schedule will appear and continue to update as the show goes on.
Tip: Schedule Tab – Adding to your schedule is easy. Tap the Plus sign (top right) and follow the prompts to add appointments. NOTE – Events can be scheduled thru the events tab with one touch. See Tip Events
Tip: Maps Tab – Map selection is broken down by halls, levels, and venues. When you go to a map it will render to show the full map. Use the multi touch capability to pinch and zoom in on the map to see the names and logos of the exhibitors. All of the booths are “hot” and will give you info about the exhibitor (such as contact, web, and handouts) if you click them. Booth spaces that are yellow are your favorites.
Location Feature – Follow Me provides a feature to show you where you are on the show floor with a blue circle. Enter an exhibitor or room number you see and the app will locate you. When a user locates themselves using the locate me function it will either turn the booth red or just zoom in on the session room that they have chosen. When using exhibit hall routing, both booths will be red and a green arrow will connect the two with the route chosen
Tip: Exhibitor Tab - The initial view is ordered alphabetically. You can also search by pulling down the top with your finger which will reveal a search bar. Searches can be done by exhibitor name, keywords, booth number, etc. Searches may appear to hang for a second but they are dynamically producing your list from the search criteria. Remember: they will bring up everything to do with the search string you put in.
- Exhibitor detail screen – Shows exhibitor information.
- Favorite - Exhibitors can be flagged as favorites by tapping the star button at the top left. This will add them to the favorites list and highlight them on the floor map in yellow. You can tap the star button on the full exhibitor list to get a list of only your favorites.
- Get Directions – Tapping this button will take you to the correct hall, venue, etc and show you where the exhibitor is on the show floor. The exhibitor will be highlighted in red.
- Handouts – Handouts can be found under the Resources tab. If you do not see any handouts – Please tell the exhibitor they need to participate. Handouts can be downloaded for viewing now or later or emailed. Downloaded handouts will also appear in the Downloads icon on the dashboard.
Tip: Events – Events are listed by day and time. To scroll to the next day use the arrow keys next to the date and day.
- Adding an event to your schedule – tap the star key at the top right and this will automatically add the event to your schedule. If you want to delete the event, tap the star button again to take this off your schedule. Events can also be added without going into the event detail by tapping the star on the left side in the events list.
- Rate the session – located toward the bottom on the event information.
- Speakers- Listed at the bottom of the event – tap a name and get the bio of the speaker
Tip: Twitter – You can view and post to the feed. Posting requires setup at the dashboard setup screen. See Tip Setup
Tip: Show Documents – Many important show documents are stored here as .pdfs. To view/email a document, tap on the file name, choose “download (if you want to view)” or “email”. If you choose download, the document will not automatically open. You must tap the name of the file after the item has downloaded.